Troubleshooting
All Digital and Analogue Radios
General Troubleshooting
All digital and analogue radios
Digital Radios Troubleshooting
Please perform a factory reset. You may have to perform a factory reset twice.
Please refer to manual or call Canohm service department
No reception or interference causing static
DPR-35 Troubleshooting
No sound from speaker or from ear phones and functionality issues
If no change, PLEASE PERFORM A FACTORY RESET ONCE MORE
If still no change please contact the Canohm service department
Internet Troubleshooting
Reset the MODEM. Power it off for 20 seconds, then turn on and wait until all buttons/lights turn to green.
Note: Enter Wi-Fi password carefully
Firstly, you should be aware that you will almost certainly experience occasional dropouts while listening to Internet Radio. This is simply the nature of the Internet, and of the technology involved. Some of the causes can be minimised at the receiver’s end, but many are outside your control.
The 4 main causes of radio dropout are:
Step 1

When you apply power, the display on the radio will light up and say: ‘SANGEAN’. The first time that you use your radio (or after Factory Reset) the display will show “Setup wizard”
Step 2

“YES” will be highlighted on the screen. Press the Tuning Control Rotary to start the setup wizard.
Step 4
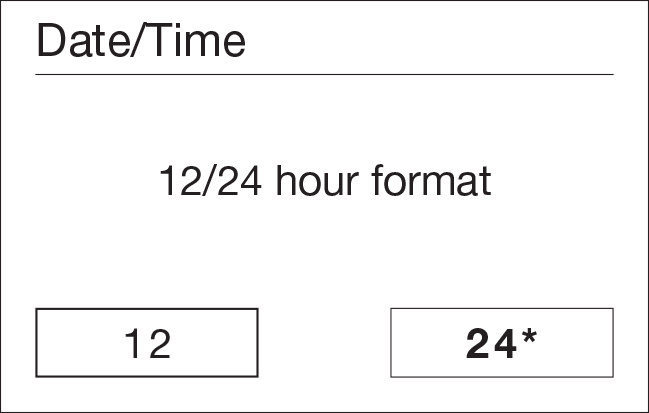
Rotate the Tuning Control Rotary on the right-hand side of the unit to highlight the desired clock format (either 12 or 24 hour) then press the Tuning Control Rotary to enter your selection.
Step 5
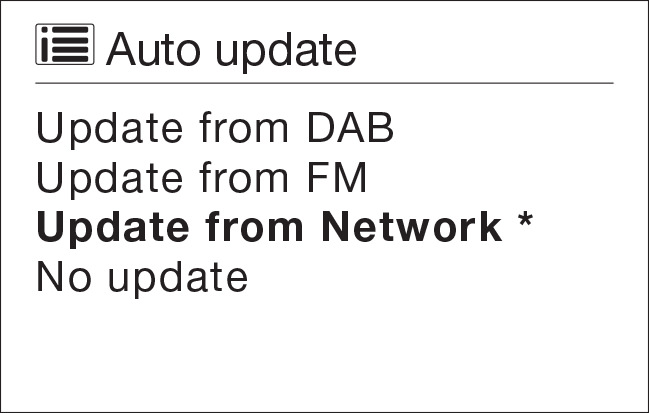
A menu allowing you to specify the auto update option for the clock will appear on the display.
Step 10
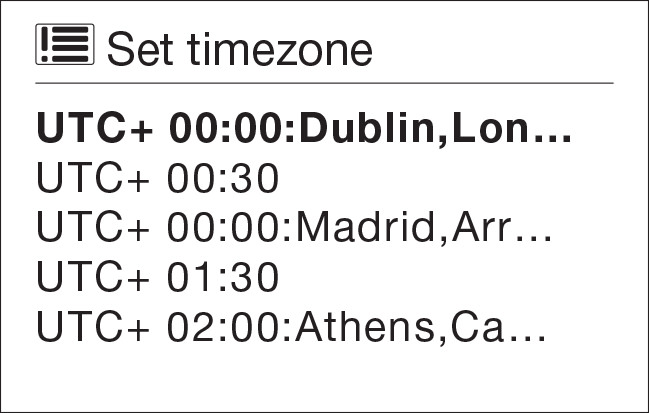
Rotate the Tuning Control Rotary to highlight the time zone which is applicable to your location. Press the Tuning Control Rotary to enter the setting.
Step 13

You will then need to set ‘Keep network connected.’ By default, your radio will shut down its Wi-Fi connection when it is in standby.
Step 16

The display will then show a list of Wi-Fi regional options for the network set up.
Step 19

The radio will enter the Network Settings Wizard and will display ‘Scanning…’ After a short while the display will show a list of the available Wi-Fi networks. – “SSID”
Step 20

If the router supports Wi-Fi Protected Setup, then ‘[WPS]’ will be shown in front of the SSID.